Etching fill areas
I think the first place to start off with when you're doing laser etching is to consider what you're expecting to achieve. This might be how deep you want the etch, to be how dark you want the etching to be and these factors come into play when you have to consider the material you're cutting and how it will react to the laser.
In relation to the laser itself, you need to consider the speed you're etching at and the amount of power you're applying to the laser. You may also need to consider that getting the best results may require several passes with the laser.
One of the main considerations you need to apply is that the laser is burning the material. Therefore, you can get various reactions from the material depending on how strong the laser is, how close the laser etching passes are, and how much time the material has to cool before the next pass.
The following is worth considering when working out the settings required for your laser etching and it is normally recommended that you test various possible settings on the material (that you don't mind scrapping) so that you can get a good understanding of what settings you will need to apply to get the required results.
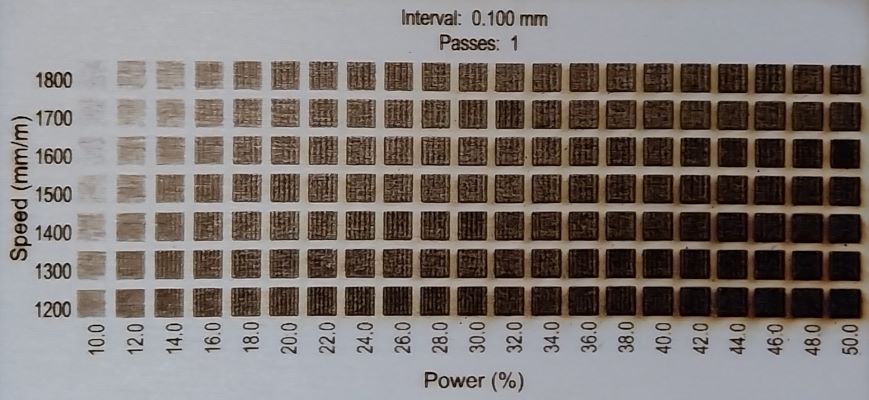
An example of a material test using LaserBurn
Different types of fill.
The two types of fill available via Lightburn are a line fill, which can have a number of different settings to control direction, angle, and cross-hatching. The other option is an offset fill, which uses concentric shapes to fill the object.
In most cases, you will need to use the line fill. The offset fill can provide a good and interesting result, but there are significant considerations to apply when using it. It is a more aggressive fill, so it will usually end up cutting deeper and applying more of a burn effect to the material. This fill is not ideal for images with small details or thin lines, but it can produce spectacular results.
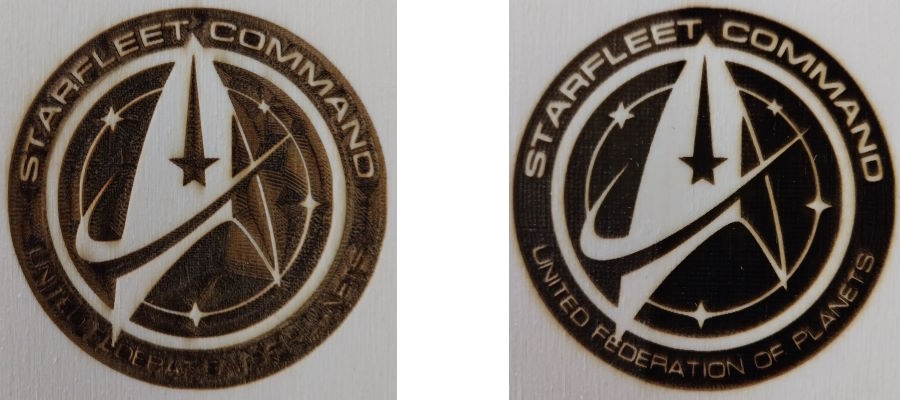
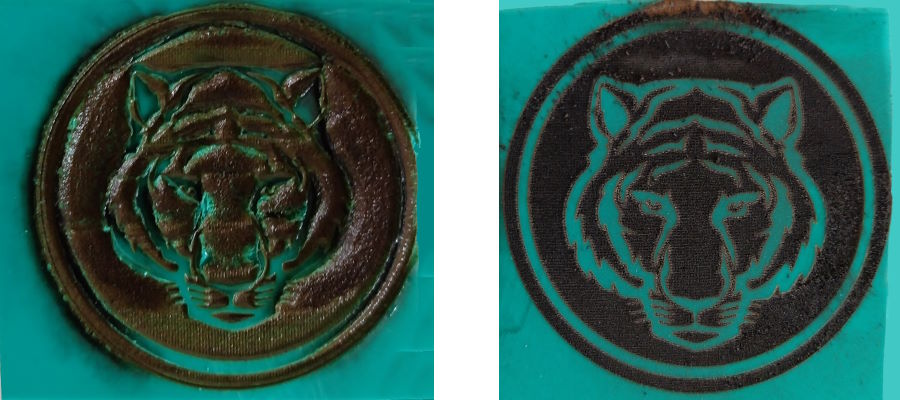
The image on the left was created using the "Offset Fill", the one on the right is using a "Line Fill"
Speed and power
To get the best results when you're etching the material you need to consider the effect that the power laser will have on the material and offset this against the movement speed of the laser. It is not always best to etch at a lower speed and a higher power laser as this is more likely to produce a burn effect beyond the actual cut, but also etching at a higher speed and a lower power may not etch the material to the level you're after and possibly not even work at all.
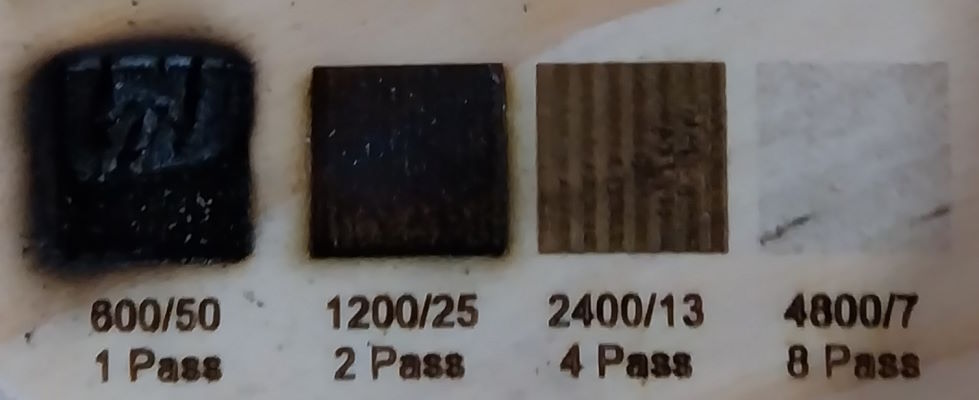
The above shows how lowering the power and increasing the number of passes can produce results for the same total laser power
"Line" fill methods
Lightburn offers several different fills. The default fill fills all of the shapes at the same time and therefore can be quite slow as the laser transitions between the different etching points on a linear basis. The other fills such as grouping filling shapes individually or doing flood fills can speed up the etching process but can also have a detrimental effect if the material is affected when burns happen in close time intervals (not allowing the material to cool before the next pass).
This shows the difference between using a flood fill (Left image) and using the default fill (Right image).
As the laser had a shorter distance to travel at the top of the etching on the right, you can see that there has been an overturn.
\ Get the latest news /